
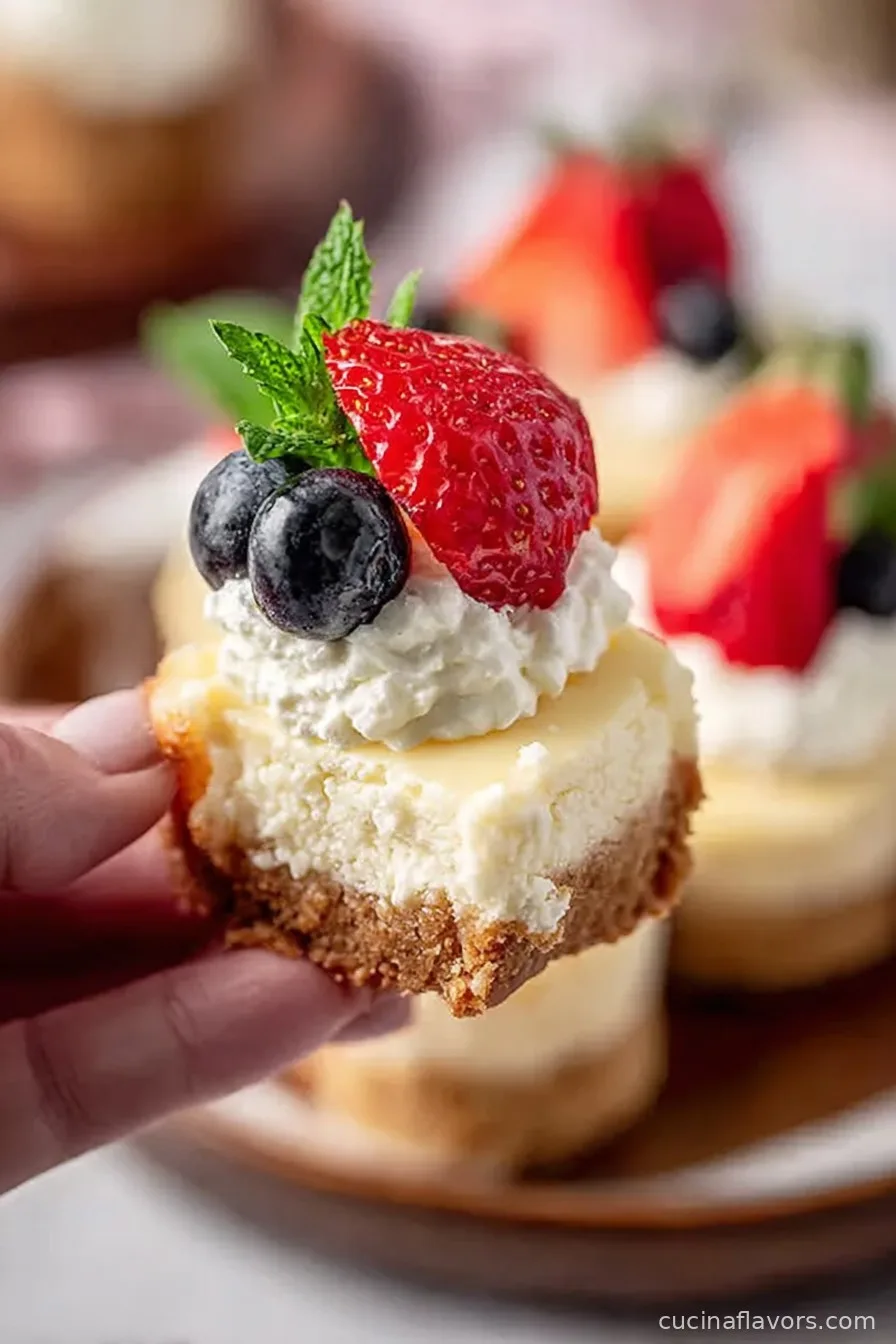
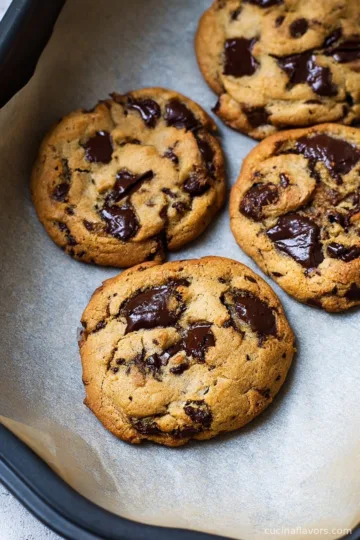
Mini cheesecake recipes have charmed dessert lovers for decades, offering all the creamy decadence of classic cheesecakes in perfectly portioned, bite-sized delights.
These individual cheesecakes first soared in popularity during the holiday seasons and at special events, where their convenience, elegance, and easy serving captured the hearts of bakers and guests alike.
With roots tracing back to the rich, creamy cheesecakes of ancient Greece and evolving through modern American culinary innovation, mini cheesecakes represent a harmonious blend of tradition and easy entertaining.
Perfect for parties, potlucks, and celebrations, the mini cheesecake recipe allows everyone to enjoy a personal-sized dessert without the need for slicing and serving a large cake. These treats also lend themselves beautifully to a variety of toppings and flavors, making them a versatile addition to any dessert table.
Whether you are new to baking or a seasoned chef, mastering the mini cheesecake recipe will elevate your dessert skills and charm your friends and family.
This article will guide you step-by-step through crafting the perfect bite-sized cheesecake, with tips, variations, serving ideas, and everything you need for delicious results every time.
Ingredients
- 1 ½ cups graham cracker crumbs
- ¼ cup granulated sugar
- ⅓ cup unsalted butter, melted
- 16 oz (two 8-oz packages) cream cheese, softened
- ⅔ cup granulated sugar
- 2 large eggs, room temperature
- 1 teaspoon pure vanilla extract
- ¼ cup sour cream, room temperature
- ¼ cup heavy cream
- Pinch of salt
Instructions
- Preheat your oven to 325°F (163°C) and line a 12-cup muffin tin with cupcake liners.
- Mix graham cracker crumbs, ¼ cup granulated sugar, and melted butter in a medium bowl until the mixture resembles wet sand.
- Spoon about 1 tablespoon of the crumb mixture into each muffin cup and press down firmly to form the crust.
- Bake crusts for 5 minutes, remove from oven, and allow to cool while you prepare the filling.
- In a large mixing bowl, beat the softened cream cheese until smooth and creamy.
- Add ⅔ cup sugar and a pinch of salt, beating until light and fluffy.
- Add eggs, one at a time, mixing well after each addition.
- Blend in sour cream, heavy cream, and vanilla extract until completely incorporated and smooth.
- Divide the cheesecake batter evenly among the prepared muffin cups, filling each nearly to the top.
- Bake for 18-22 minutes or until edges are set and centers are slightly jiggly.
- Remove from the oven, cool in the pan for 20 minutes, then transfer to a wire rack.
- Refrigerate mini cheesecakes for at least 3 hours, or overnight, before removing liners and serving with your favorite toppings.
Nutritional Information
Mini cheesecakes can be enjoyed as a sweet treat while still being conscious of your nutritional needs. Each mini cheesecake (based on a recipe yielding 12 servings) contains approximately 210-250 calories, depending on specific ingredient brands and optional toppings.
The breakdown per serving includes around 15 grams of fat (with some saturated fat due to the cream cheese and butter), 20 grams of carbohydrates, 12 grams of sugar, and 4 grams protein.
While mini cheesecakes are considered a rich dessert, the portion-controlled size helps to manage intake, making them a smart choice for those watching their caloric or sugar consumption. Using reduced-fat cream cheese or replacing some of the sugar with a sugar alternative can further lower calories without sacrificing flavor.
The inclusion of eggs and dairy also adds a small boost of protein, calcium, and essential vitamins. Remember, enjoying a mini cheesecake recipe is all about moderation—these bite-sized treats allow you to savor a decadent dessert without excessive indulgence.
Opt for fresh fruit toppings like strawberries, blueberries, or raspberries to add vitamins, minerals, and antioxidants for an extra healthful touch.

Wine and Beverage Pairings
Mini cheesecakes pair beautifully with a wide range of beverages, allowing you to set the perfect mood for any occasion. For a classic touch, serve them with sparkling wine or champagne—the bubbles balance the creamy, rich texture exquisitely.
If you prefer still wines, a late-harvest Riesling, Moscato, or Sauternes offers delightful sweetness and acidity that complements the cheesecake’s tang. Coffee enthusiasts will love how an espresso or dark roast coffee brings out the depth of vanilla and cream cheese flavors.
For a non-alcoholic option, try herbal teas such as chamomile or a fruit-flavored iced tea to enhance the fruity notes of your cheesecake toppings. A chilled glass of milk is always a timeless pairing, especially if you choose to top your mini cheesecakes with chocolate or caramel.
Cooking Tips and Variations
For the perfect mini cheesecake recipe, several helpful tips can ensure flawless results every time. First, always use room temperature ingredients, especially cream cheese, eggs, and sour cream. This allows for a smooth, lump-free batter that bakes evenly.
When preparing your graham cracker crust, press it firmly into the bottom of each muffin liner—use a flat-bottomed glass or your fingers to compact the crumbs. Baking the crust briefly before adding the filling prevents sogginess.
Be careful not to overmix the cheesecake batter, as excessive air can cause cracks or a less creamy texture. After baking, the mini cheesecakes should jiggle slightly in the center; they will firm up as they cool and chill.
For effortless release from cupcake liners, thoroughly chill the cheesecakes for several hours or overnight. To customize your mini cheesecake recipe, experiment with flavor variations such as adding lemon zest, chocolate chips, or a swirl of fruit preserves to the batter.
Toppings offer even further flexibility, from luscious chocolate ganache and caramel drizzle to fresh berries or fruit curds. If you prefer a gluten-free option, substitute gluten-free graham crackers for the crust. For a richer flavor, swap sour cream for Greek yogurt or incorporate a hint of almond extract.
Mini cheesecakes are also freezer-friendly: wrap well and store for up to one month, and thaw in the refrigerator before serving.

Serving Suggestions
Presenting mini cheesecakes can be as simple or elegant as you desire. For casual gatherings or kid-friendly events, serve the cheesecakes directly in their cupcake liners, arranged on a festive tray or wooden platter.
For more sophisticated occasions, remove the liners and display the cheesecakes on a decorative dessert stand, garnished with a dollop of fresh whipped cream and an assortment of fresh berries or edible flowers.
Consider offering a mini cheesecake bar, complete with a variety of toppings such as chocolate sauce, caramel, lemon curd, chopped nuts, fruit preserves, or candy pieces so guests can customize their dessert.
These bite-sized cheesecakes are perfect at bridal or baby showers, birthdays, and holiday buffets, accommodating dietary preferences and portion sizes. You can also personalize the mini cheesecakes with seasonal decorations—think orange zest in autumn, peppermint pieces for winter holidays, or pastel fruit slices in spring and summer.
Individually wrapped mini cheesecakes make delightful edible gifts, wedding favors, or party takeaways. Serve chilled for the creamiest texture, and remember to refrigerate any leftovers promptly to maintain freshness and flavor.
Health Benefits
Although mini cheesecakes are an indulgent treat, they can be enjoyed as part of a balanced diet. Their portion-controlled size helps limit calorie and sugar intake, making them a smarter dessert choice compared to traditional large slices.
The main ingredients—cream cheese, eggs, and dairy—contribute protein, calcium, vitamin D, and other essential nutrients important for bone health and muscle repair. Using reduced-fat cream cheese or swapping sour cream for Greek yogurt lowers fat and increases protein content.
For a higher fiber, lower glycemic treat, consider using whole grain or gluten-free graham crackers for the crust and topping with antioxidant-rich berries. Control the sugar level by opting for natural sweeteners like stevia or monk fruit.
Moderation is key, and the mini cheesecake recipe’s bite-sized format makes it easier to indulge without overdoing it. By adding fruit toppings, you increase vitamin content and introduce phytonutrients beneficial for immunity and heart health.
For those who are lactose intolerant or need a dairy-free version, substitute plant-based cream cheese, coconut yogurt, and dairy-free butter to enjoy mini cheesecakes without compromising dietary restrictions.
Frequently Asked Questions
Yes, mini cheesecakes are ideal for making ahead. Store them tightly covered in the refrigerator for up to three days before serving, or freeze for up to one month. Thaw overnight in the fridge for best texture.
To prevent cracks, avoid overmixing the batter and don’t overbake. The centers should slightly jiggle when done and firm up during chilling. Using room temperature ingredients also helps.
Absolutely! You can swap the graham cracker crust for crushed chocolate cookies, vanilla wafers, gingersnaps, or even a nut-based crust to suit your taste or dietary needs.
The basic recipe contains gluten due to the graham crackers, but you can easily substitute with gluten-free graham crackers or cookies to make them gluten-free.
Popular toppings include fresh fruits, berry compote, chocolate ganache, caramel sauce, lemon curd, whipped cream, or chopped nuts. Get creative with your favorite flavors and textures.
Mini cheesecakes are a delightful dessert perfect for any occasion. With their adorable, single-serving size, creamy filling, and endless customization options, they make entertaining fun and stress-free. The mini cheesecake recipe is easy to master and offers consistent, crowd-pleasing results. Whether you’re hosting a dinner party, celebrating a special event, or simply craving something sweet, mini cheesecakes are sure to impress. Remember to experiment with flavors, toppings, and crusts to create your own signature treats. Enjoy sharing these bite-sized desserts with friends and family, and let every mini cheesecake bring a moment of indulgence and happiness to your table.
Ingredients
- 1 ½ cups graham cracker crumbs
- ¼ cup granulated sugar
- ⅓ cup unsalted butter, melted
- 16 oz (two 8-oz packages) cream cheese, softened
- ⅔ cup granulated sugar
- 2 large eggs, room temperature
- 1 teaspoon pure vanilla extract
- ¼ cup sour cream, room temperature
- ¼ cup heavy cream
- Pinch of salt
Instructions
-
1Preheat your oven to 325°F (163°C) and line a 12-cup muffin tin with cupcake liners.
-
2Mix graham cracker crumbs, ¼ cup granulated sugar, and melted butter in a medium bowl until the mixture resembles wet sand.
-
3Spoon about 1 tablespoon of the crumb mixture into each muffin cup and press down firmly to form the crust.
-
4Bake crusts for 5 minutes, remove from oven, and allow to cool while you prepare the filling.
-
5In a large mixing bowl, beat the softened cream cheese until smooth and creamy.
-
6Add ⅔ cup sugar and a pinch of salt, beating until light and fluffy.
-
7Add eggs, one at a time, mixing well after each addition.
-
8Blend in sour cream, heavy cream, and vanilla extract until completely incorporated and smooth.
-
9Divide the cheesecake batter evenly among the prepared muffin cups, filling each nearly to the top.
-
10Bake for 18-22 minutes or until edges are set and centers are slightly jiggly.
-
11Remove from the oven, cool in the pan for 20 minutes, then transfer to a wire rack.
-
12Refrigerate mini cheesecakes for at least 3 hours, or overnight, before removing liners and serving with your favorite toppings.
Approximate Information for One Serving
Nutrition Disclaimers
Number of total servings shown is approximate. Actual number of servings will depend on your preferred portion sizes.
Nutritional values shown are general guidelines and reflect information for 1 serving using the ingredients listed, not including any optional ingredients. Actual macros may vary slightly depending on specific brands and types of ingredients used.
To determine the weight of one serving, prepare the recipe as instructed. Weigh the finished recipe, then divide the weight of the finished recipe (not including the weight of the container the food is in) by the desired number of servings. Result will be the weight of one serving.
Did you make this recipe?
Please consider Pinning it!
Leave a Reply