
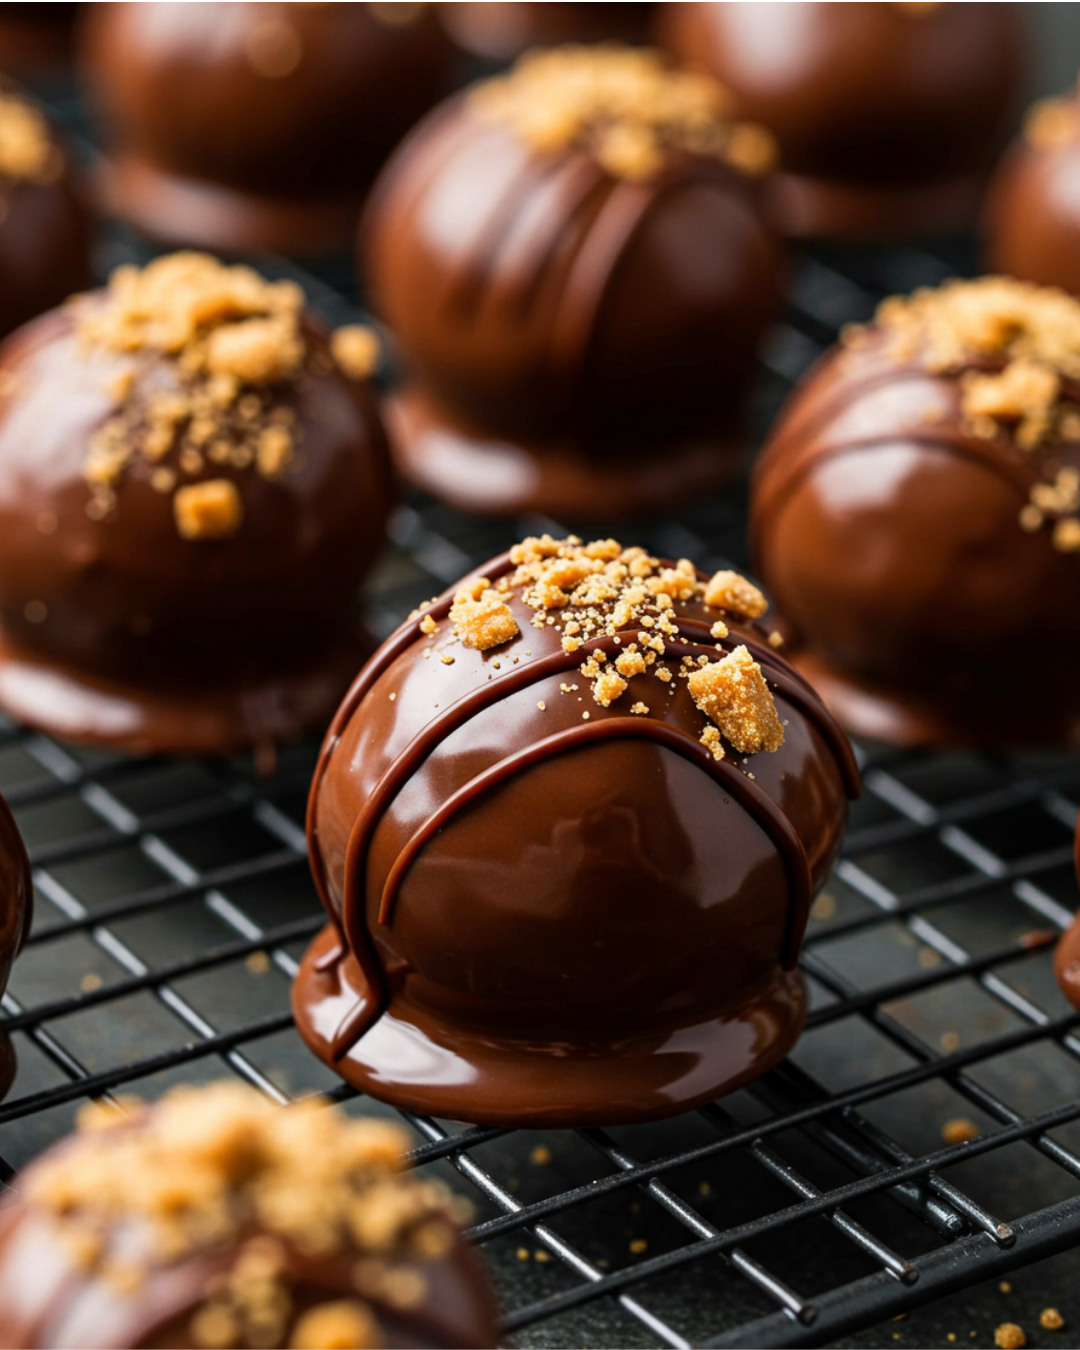
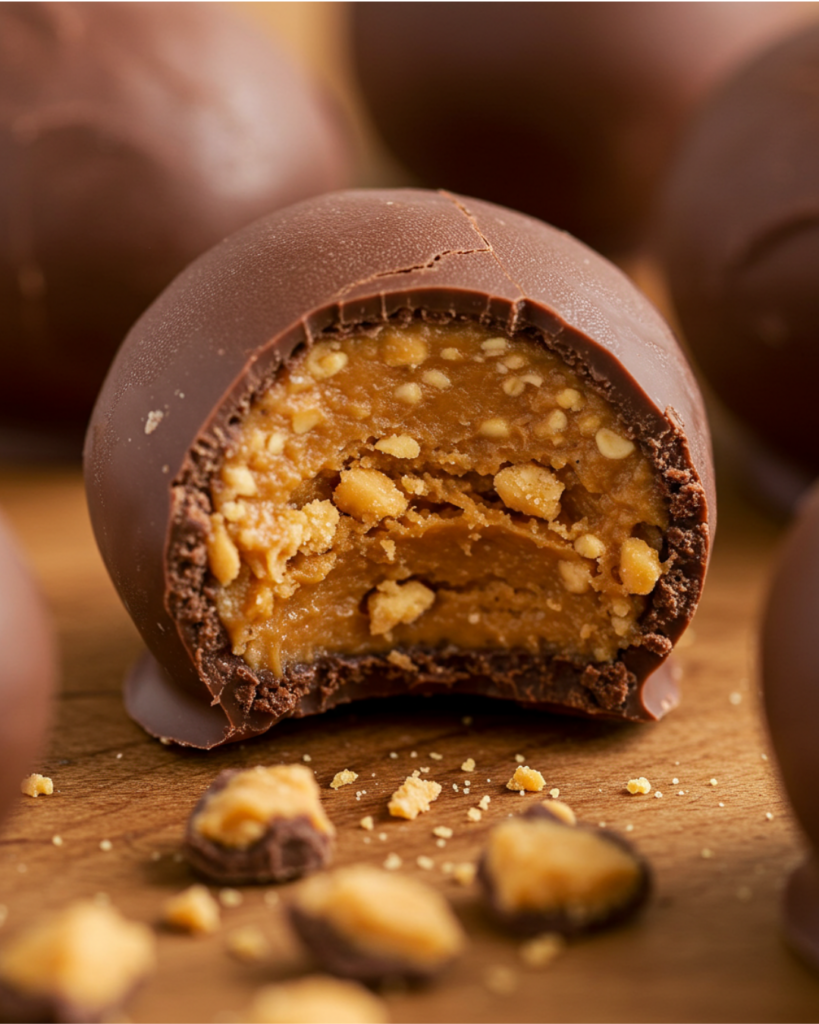
Butterfinger Balls are the perfect no-bake dessert for anyone who loves the crispy, peanut buttery goodness of Butterfinger candy bars. These bite-sized treats combine crushed Butterfingers, creamy peanut butter, and a chocolate coating for an irresistible snack. Whether you’re preparing for a holiday gathering, a birthday party, or just want a quick sweet fix, this Butterfinger Balls recipe will become your go-to!
Why You’ll Love This Recipe
- No baking required – Perfect for quick preparation.
- Only a few ingredients – Simple and budget-friendly.
- Great for any occasion – Serve them at parties or gift them in holiday treat boxes.
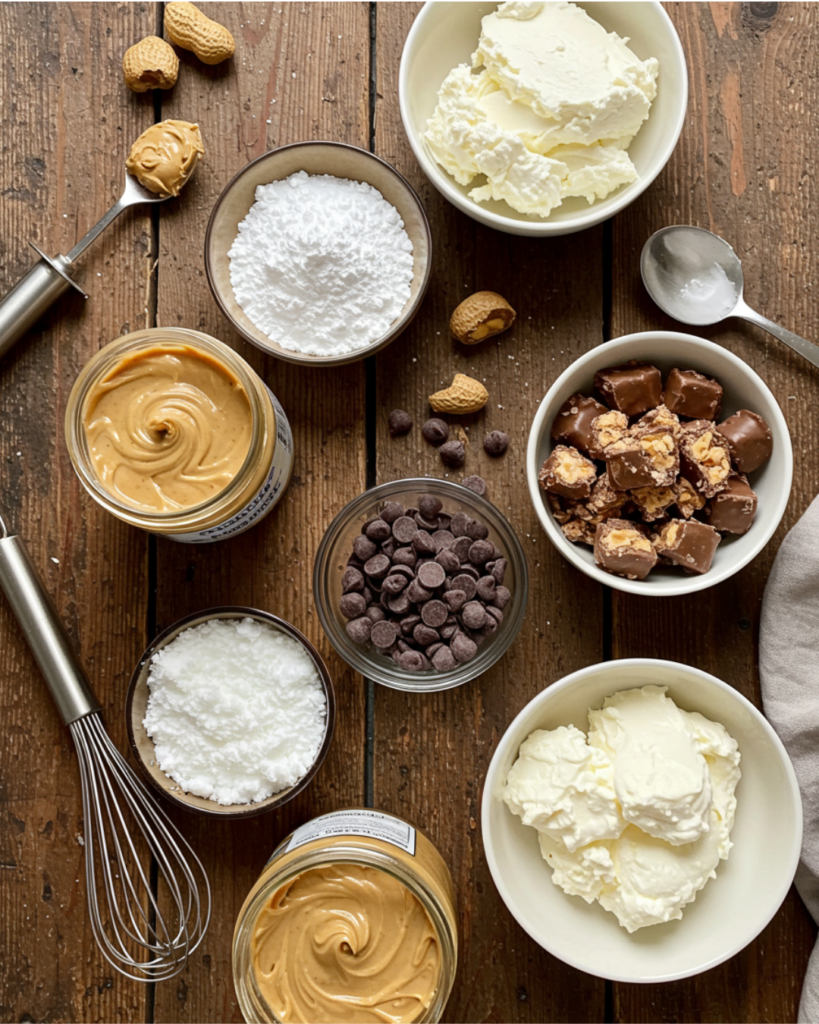
Butterfinger Balls Ingredients
To make these delicious Butterfinger Balls, you’ll need:
- 2 cups crushed Butterfinger candy bars
- 1 cup creamy peanut butter
- 2 cups powdered sugar
- 1/4 cup unsalted butter (softened)
- 12 oz semi-sweet or milk chocolate (for coating)
- 1 tbsp coconut oil or vegetable shortening (optional, for a smoother chocolate coating)
Instructions
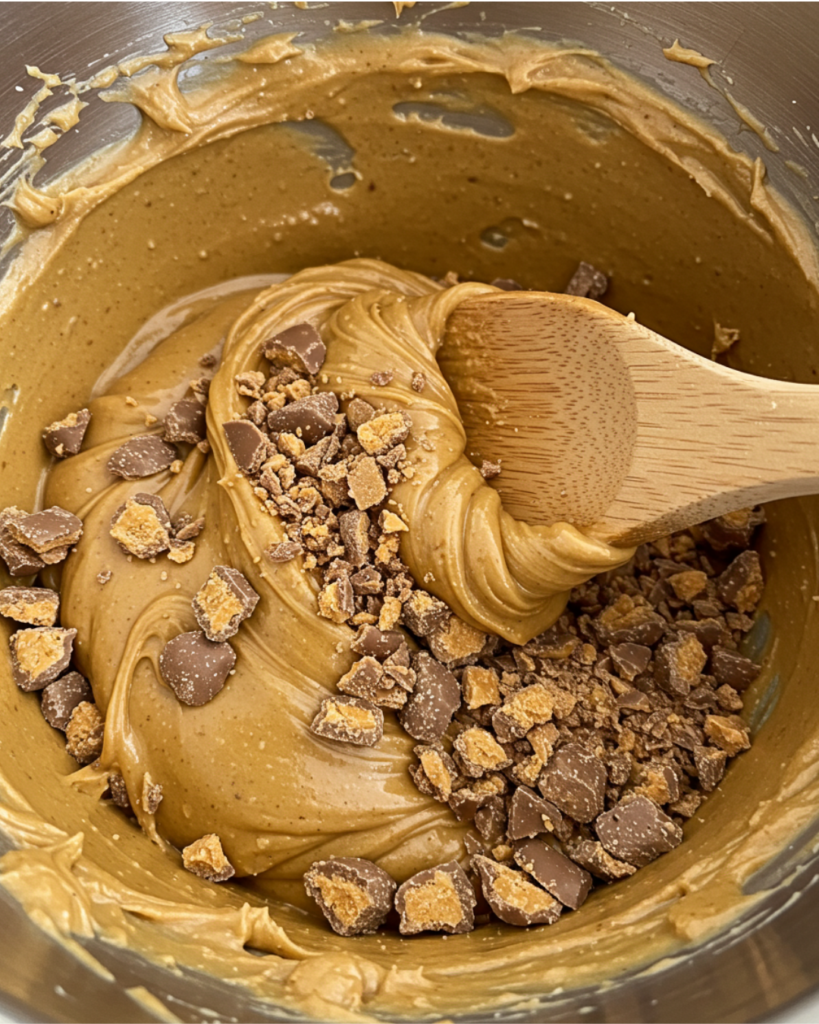
1: Prepare the Filling
- Crush the Butterfinger candy bars into fine crumbs using a food processor or by placing them in a ziplock bag and crushing with a rolling pin.
- In a large bowl, mix the crushed Butterfingers, peanut butter, powdered sugar, and softened butter until fully combined. The mixture should hold together when pressed.
2: Roll into Balls
- Scoop out small portions of the mixture and roll them into 1-inch balls.
- Place them on a parchment-lined baking sheet.
- Refrigerate for at least 30 minutes to firm up.
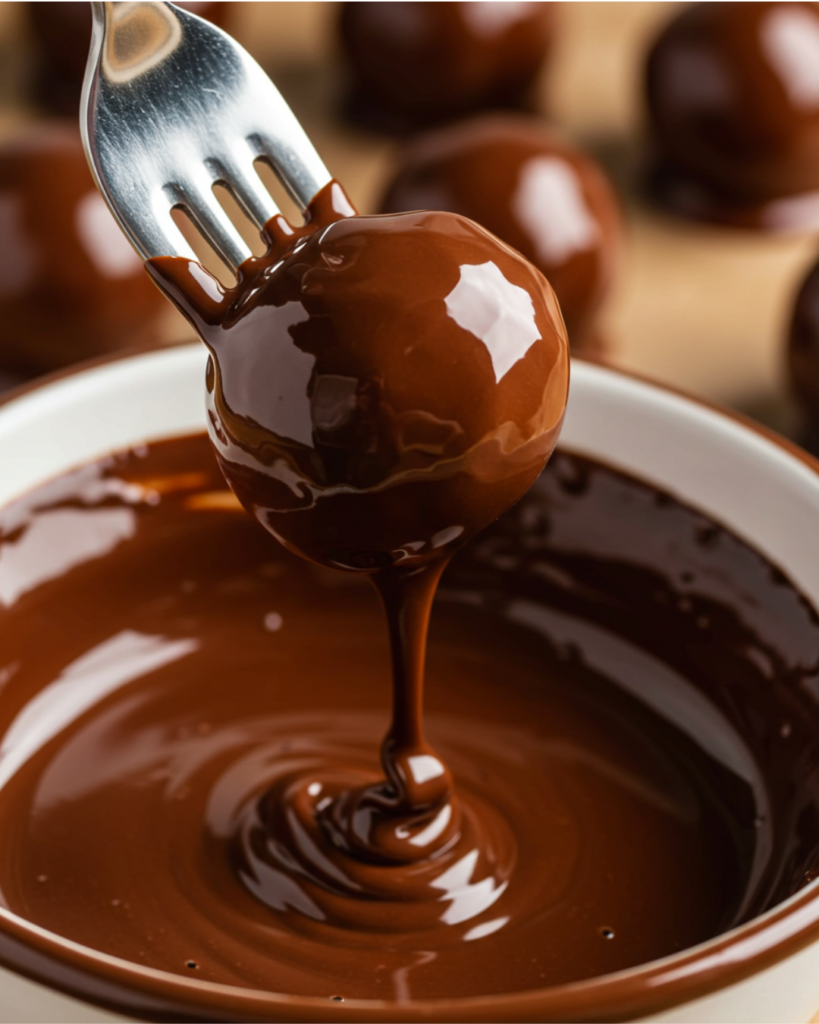
3: Melt the Chocolate
- In a microwave-safe bowl, melt the chocolate in 30-second intervals, stirring in between, until smooth.
- If needed, add 1 tablespoon of coconut oil or shortening for a silkier texture.
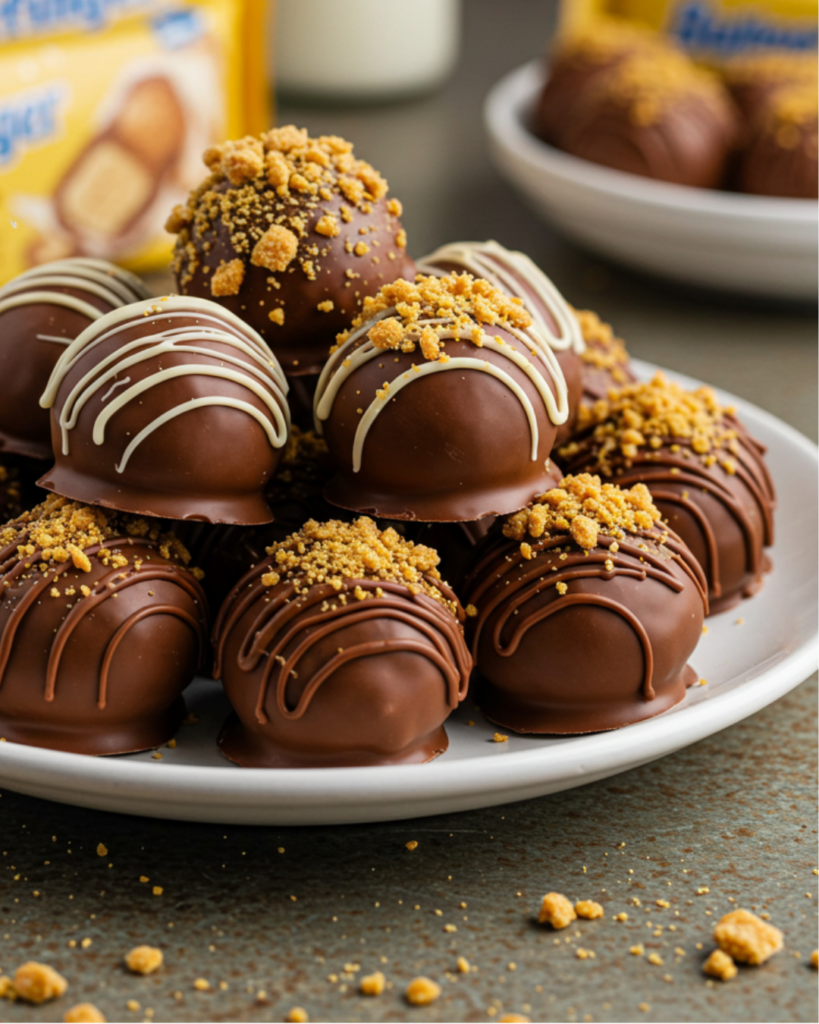
4: Coat the Butterfinger Balls
- Using a fork or toothpick, dip each Butterfinger ball into the melted chocolate, coating it completely.
- Place them back on the parchment-lined sheet.
- Let the chocolate set at room temperature or refrigerate for faster setting.
5: Serve and Enjoy!
Once the chocolate has hardened, your homemade Butterfinger Balls are ready to enjoy! Store them in an airtight container in the fridge for up to a week.
Tips for the Best Butterfinger Balls
- Use room temperature peanut butter for easier mixing.
- Crush the Butterfingers finely so they mix well into the dough.
- Chill before dipping to prevent the balls from falling apart in the chocolate.
- Drizzle with white chocolate for a decorative touch.
Creative Variations
Want to put your own twist on this recipe? Try these fun ideas:
- Almond Butter Swap – Replace peanut butter with almond or cashew butter.
- Dark Chocolate Coating – For a richer, slightly less sweet flavor.
- Crunchy Toppings – Sprinkle crushed nuts, sea salt, or extra Butterfinger crumbs on top before the chocolate sets.
FAQs About Butterfinger Balls Recipe
1. Can I use crunchy peanut butter instead of creamy?
Yes! Crunchy peanut butter adds an extra bit of texture to the balls, making them even more delicious.
2. How do I store Butterfinger Balls?
Store them in an airtight container in the refrigerator for up to a week. You can also freeze them for up to three months.
3. Can I use white chocolate instead of milk or dark chocolate?
Absolutely! White chocolate pairs beautifully with the peanut butter and Butterfinger flavors.
4. What’s the best way to melt the chocolate?
The easiest way is in the microwave using short intervals, but you can also melt chocolate using a double boiler for better temperature control.
5. Can I make these ahead of time?
Yes! These are perfect for make-ahead treats. Just store them in the fridge or freezer until ready to serve.
Final Thoughts
These Butterfinger Balls are an easy, no-bake dessert that combines peanut butter, chocolate, and crunchy candy into a bite-sized delight. They’re simple to make, fun to eat, and perfect for any occasion. Try this recipe and let us know how it turns out in the comments!
Would you like more no-bake dessert ideas? Let us know what you’d love to see next!