
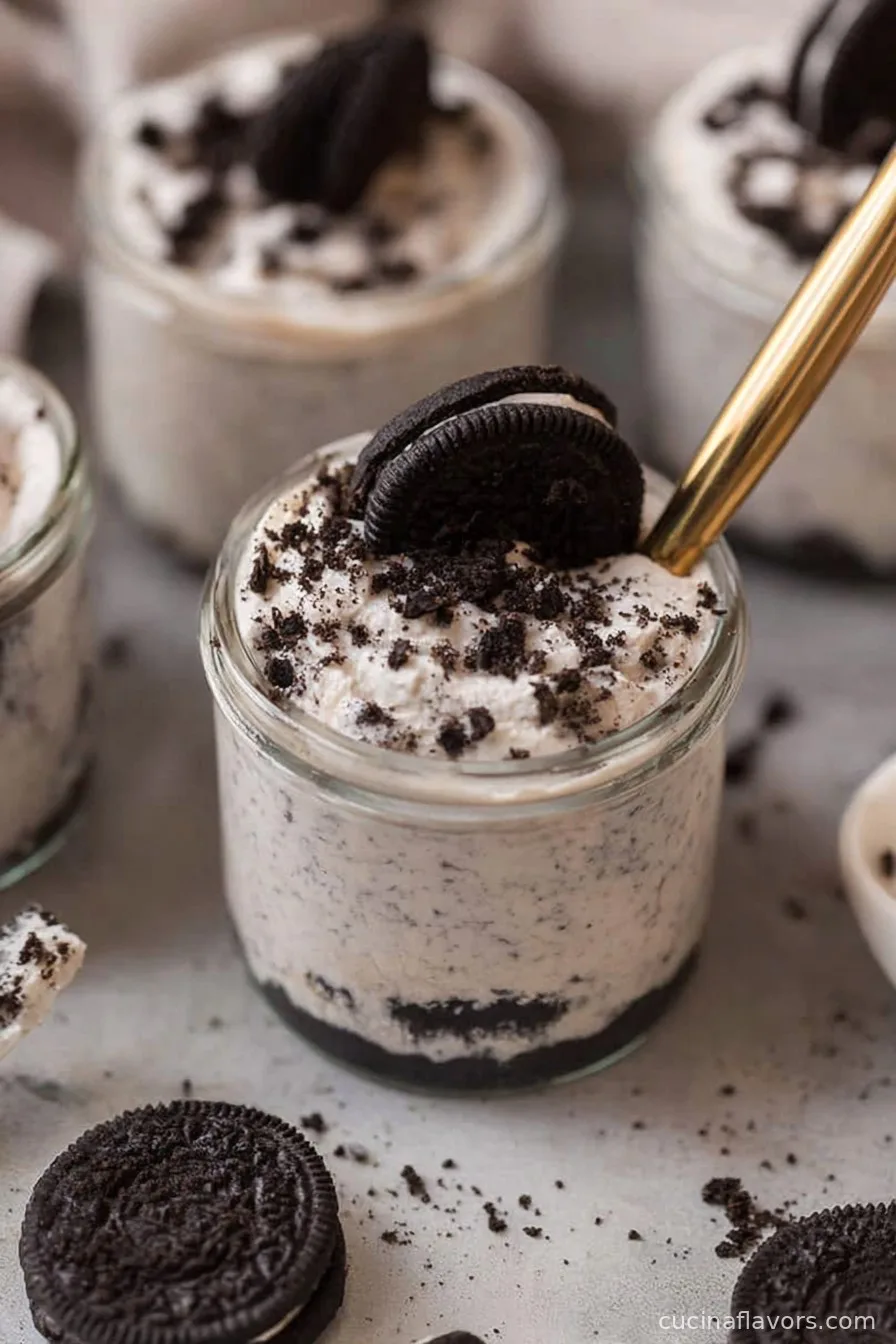
No-Bake Oreo Cheesecake Cups are the epitome of effortless indulgence, combining the iconic flavor of cookies and cream with the creamy decadence of classic cheesecake—all without turning on your oven.
This no-bake dessert has soared in popularity thanks to its simplicity and versatile presentation, perfect for parties, gatherings, or a delightful weeknight treat.
Oreo cookies, first introduced by Nabisco in 1912, have steadily become a staple in dessert recipes worldwide, inspiring creative takes such as no-bake cheesecakes, cookie balls, and pies.
The no-bake movement in baking began gaining traction in the latter half of the twentieth century as home cooks sought shortcuts that didn’t sacrifice flavor or presentation. The beauty of No-Bake Oreo cheesecake Cups lies not only in their convenience but also in their customizable and portion-controlled nature.
Served in individual cups or jars, they cater to those craving just the right amount of sweetness.
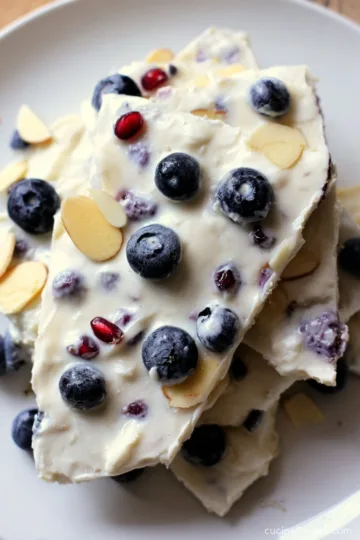
These creamy, layered desserts offer a harmonious blend of crushed Oreo cookies as a base, followed by a rich, tangy cheesecake layer, and finished with a sprinkle of more cookies or a dollop of whipped cream.
Known for their luscious texture and unmistakable taste, these cups are as photogenic as they are delicious, often gracing Instagram feeds and dessert tables alike.
Whether you are a seasoned home baker or a novice looking for an easy, crowd-pleasing dessert, No-Bake Oreo Cheesecake Cups are sure to be your new favorite no-bake treat.
This recipe is not only quick to assemble but also perfect for making ahead, ensuring you spend more time enjoying and less time preparing. Let’s dive into this deliciously simple recipe and uncover tips, serving suggestions, and key information to make your No-Bake Oreo Cheesecake Cups truly unforgettable.
Ingredients
- 24 Oreo cookies, divided (16 for crust, 8 for filling and garnish)
- 3 tablespoons unsalted butter, melted
- 8 ounces cream cheese, softened
- ⅓ cup granulated sugar
- 1 teaspoon vanilla extract
- 1 cup heavy whipping cream, cold
- Optional: additional whipped cream for topping
Instructions
- Crush 16 Oreo cookies in a food processor or zip-top bag until finely ground.
- Pour the melted butter over the crushed Oreos and mix until the crumbs are evenly coated and clump together.
- Spoon about 2 tablespoons of the Oreo crust mixture into the bottom of six serving cups or jars. Gently press down with the back of a spoon to form a firm crust. Place in the refrigerator to set while preparing the filling.
- In a large bowl, beat the softened cream cheese and granulated sugar with an electric mixer until smooth and creamy. Add the vanilla extract and mix until combined.
- In a separate chilled bowl, whip the cold heavy cream with a mixer until stiff peaks form. Be careful not to over-whip.
- Gently fold the whipped cream into the cream cheese mixture in two parts, being careful to maintain the lightness of the whipped cream.
- Coarsely chop or crush the remaining 8 Oreo cookies and fold them into the cheesecake mixture.
- Remove the cups from the refrigerator and spoon or pipe the cheesecake filling evenly over the Oreo crusts, smoothing the tops.
- Optionally, top each cup with extra whipped cream and a sprinkle of crushed Oreo cookies.
- Refrigerate the assembled cups for at least 2 hours or until set. Serve chilled and enjoy!
Nutritional Information
No-Bake Oreo Cheesecake Cups are a decadent dessert that balances rich flavors with lighter preparation. Each individual cup (assuming the recipe makes six servings) contains approximately 350 to 380 calories, making it an occasional treat rather than an everyday snack.
The primary macronutrients are carbohydrates and fats, contributed mainly by Oreo cookies, cream cheese, and heavy cream. Each cup contains roughly 25 to 28 grams of carbohydrates, 5 grams of protein, and 22 to 24 grams of fat.
These values can vary based on the exact ingredients used and the size of each serving. The dessert contains calcium from the cream cheese and cream, offering some bone-supporting benefits, while the sugar content provides an energetic boost—ideal for festivities but best enjoyed in moderation.
For those with dietary restrictions, it's important to remember that this dessert contains dairy, gluten, and added sugars. The use of full-fat cream cheese and whipped cream ensures a creamy texture but also increases saturated fat content.
For a lighter version, you may substitute light cream cheese and use a whipped topping lower in fat, which will moderately reduce calorie and fat content. Nonetheless, as a once-in-a-while treat, No-Bake Oreo Cheesecake Cups allow for indulgence with the advantage of portion control, given their individual serving style.
By making your own, you control ingredient quality and can cater to specific nutritional needs or preferences. Enjoy them as part of a balanced diet and an active lifestyle.
Wine and Beverage Pairings
No-Bake Oreo Cheesecake Cups pair exceptionally well with a variety of beverages. For a classic, child-friendly option, serve with a tall glass of cold milk—the milk complements the chocolate and cream flavors.
For adults, a robust cup of fresh-brewed coffee or an espresso serves as the perfect bitter contrast to the richness of the cheesecake.
For those seeking a wine pairing, a sweet or semi-sweet wine such as Moscato d’Asti, late-harvest Riesling, or even a light ruby Port can enhance the dessert’s creamy, chocolatey profile.
If you prefer nonalcoholic pairings, try iced coffee, vanilla chai, or a subtly sweet herbal tea, such as chamomile or rooibos, which balance out the dessert’s richness while refreshing the palate.
Cooking Tips and Variations
Mastering No-Bake Oreo Cheesecake Cups is all about getting the ratios and technique just right. First, make sure your cream cheese is fully softened before blending—this will ensure a smooth, lump-free filling. When preparing the Oreo crust, finely crush the cookies to help the base set firmly.
Using salted or unsalted butter is up to your taste, but unsalted keeps the flavor classic. When incorporating the whipped cream, gentle folding is crucial to maintain an airy, mousse-like texture; avoid overmixing, as this can deflate the filling.
For an extra layer of flavor, consider adding a pinch of salt to the crust or a few drops of almond extract to the cheesecake layer.
If you're making these cups ahead, assemble up to a day in advance, refrigerate, and add the final toppings right before serving to keep them fresh. To spice up the presentation, serve in small mason jars, shot glasses, or even cupcake liners for parties.
Variations abound: swap Oreos for chocolate chip cookies, graham crackers, or gluten-free cookies for different tastes and dietary needs. For a festive touch, add colored sprinkles, a fruit compote swirl, or drizzle melted chocolate on top. Make smaller, bite-sized portions for dessert buffets, or larger servings for a special treat.
With just a few thoughtful tweaks, you can tailor No-Bake Oreo Cheesecake Cups to any occasion or craving.

Serving Suggestions
Presentation elevates the enjoyment of No-Bake Oreo Cheesecake Cups, making them a visual delight as well as a delicious one. Consider serving each cup in clear glass jars or dessert glasses to showcase the beautiful layers of the Oreo crust, creamy cheesecake filling, and delightful toppings.
Garnishing is key—top with a small dollop of whipped cream and a sprinkle of crushed or mini Oreos for a touch of elegance. For a pop of color, add a few fresh berries such as raspberries or strawberries, or a fresh mint leaf for a touch of vibrancy.
These dessert cups are perfect for parties, baby showers, birthdays, or casual gatherings, as they are both easy to transport and serve. If serving at a buffet, display them on a decorative tray, perhaps grouped by different topping choices for variety.
To make occasions extra special, pair each cup with a miniature dessert spoon and a personalized tag or ribbon around the jar. For family dinners or weeknight treats, simply assemble and set the cups on a tray in the fridge for hands-off dessert time.
No-Bake Oreo Cheesecake Cups also make thoughtful edible gifts—just cover securely and deliver chilled. If you prepare them ahead, keep them refrigerated until serving to preserve their creamy texture and appearance. For a unique twist, try layering the cheesecake mixture and crust alternately for a ‘parfait’ effect.
However you serve them, these cups bring a blend of nostalgia, sophistication, and ease to your dessert table.
Health Benefits
While No-Bake Oreo Cheesecake Cups are an indulgent treat, they can fit into a balanced lifestyle when enjoyed in moderation. The recipe features dairy ingredients high in calcium and protein, which support bone health and satiety.
Cream cheese and heavy cream provide essential fats, which are necessary for the absorption of fat-soluble vitamins. The Oreo cookie base brings delight to the palate, contributing to a sense of celebration and satisfaction.
Since these cups are served in individual portions, it’s easier to control serving size and monitor intake.
For those looking to reduce sugar or fat content, consider using reduced-fat cream cheese or Greek yogurt in place of some or all the cream cheese, and substitute light whipped toppings for the heavy cream. There are gluten-free and lactose-free cookie alternatives for those with dietary needs.
Making your own desserts at home allows you to adjust ingredients and tailor recipes to your needs, providing transparency and control over additives, preservatives, or allergens commonly found in store-bought sweets.
Remember, desserts like No-Bake Oreo Cheesecake Cups are best reserved for special occasions and celebrations where the joy of sharing and savoring takes center stage.
Frequently Asked Questions
You can prepare No-Bake Oreo Cheesecake Cups up to 24 hours ahead. Simply assemble and refrigerate, adding final toppings just before serving to maintain freshness.
Yes, you can substitute store-bought whipped topping in equal measure for the fresh whipped cream. This may slightly alter the texture but will keep the dessert creamy and light.
Traditional Oreo cookies contain gluten, but you can use gluten-free sandwich cookies to create a gluten-free version of this recipe.
Freezing is possible, especially if you wish to prepare them ahead for later use. Cover tightly and freeze for up to one month. Thaw in the refrigerator before serving.
To make vegan No-Bake Oreo Cheesecake Cups, use a vegan cream cheese alternative, coconut cream for whipping, and check that your sandwich cookies are dairy-free.
No-Bake Oreo Cheesecake Cups are a celebration of simplicity and decadence, making them a go-to dessert for any occasion. Their rich, creamy cheesecake layer, paired with the familiar crunch of Oreo cookies, offers both flavor and nostalgia in every spoonful. Easy to assemble, fun to customize, and striking in presentation, these cups are sure to impress family and friends with minimal effort. Whether you are looking for a crowd-pleasing party dessert, a make-ahead treat for entertaining, or a quick sweet treat to satisfy cravings, No-Bake Oreo Cheesecake Cups deliver. Embrace the joy of easy, no-bake desserts and let every bite remind you that the best sweets are often the simplest to make.
Ingredients
- 24 Oreo cookies, divided (16 for crust, 8 for filling and garnish)
- 3 tablespoons unsalted butter, melted
- 8 ounces cream cheese, softened
- ⅓ cup granulated sugar
- 1 teaspoon vanilla extract
- 1 cup heavy whipping cream, cold
- Optional: additional whipped cream for topping
Instructions
-
1Crush 16 Oreo cookies in a food processor or zip-top bag until finely ground.
-
2Pour the melted butter over the crushed Oreos and mix until the crumbs are evenly coated and clump together.
-
3Spoon about 2 tablespoons of the Oreo crust mixture into the bottom of six serving cups or jars. Gently press down with the back of a spoon to form a firm crust. Place in the refrigerator to set while preparing the filling.
-
4In a large bowl, beat the softened cream cheese and granulated sugar with an electric mixer until smooth and creamy. Add the vanilla extract and mix until combined.
-
5In a separate chilled bowl, whip the cold heavy cream with a mixer until stiff peaks form. Be careful not to over-whip.
-
6Gently fold the whipped cream into the cream cheese mixture in two parts, being careful to maintain the lightness of the whipped cream.
-
7Coarsely chop or crush the remaining 8 Oreo cookies and fold them into the cheesecake mixture.
-
8Remove the cups from the refrigerator and spoon or pipe the cheesecake filling evenly over the Oreo crusts, smoothing the tops.
-
9Optionally, top each cup with extra whipped cream and a sprinkle of crushed Oreo cookies.
-
10Refrigerate the assembled cups for at least 2 hours or until set. Serve chilled and enjoy!
Approximate Information for One Serving
Nutrition Disclaimers
Number of total servings shown is approximate. Actual number of servings will depend on your preferred portion sizes.
Nutritional values shown are general guidelines and reflect information for 1 serving using the ingredients listed, not including any optional ingredients. Actual macros may vary slightly depending on specific brands and types of ingredients used.
To determine the weight of one serving, prepare the recipe as instructed. Weigh the finished recipe, then divide the weight of the finished recipe (not including the weight of the container the food is in) by the desired number of servings. Result will be the weight of one serving.
Did you make this recipe?
Please consider Pinning it!
Leave a Reply